vuepress1.9.10详细教程(详细靠谱版)
一、确保Git、Node、yarn安装完毕
版本说明
PS C:\Users\jason> git -v
git version 2.37.0.windows.1
PS C:\Users\jason> node -v
v16.20.2
PS C:\Users\jason> npm -v
8.19.4
PS C:\Users\jason> yarn -v
1.22.22
PS C:\Users\jason> vuepress -v
cli.js/1.9.10
最开始使用的node20,后面切换到了17,最后切换到了16.20.2,没啥问题了。
二、vuepress初体验
在GitHub创建一个名称为KelsenJing的公开仓库。

使用idea拉取刚创建的仓库代码,地址为https://github.com/jinglisen/KelsenJing.git
win11打开cmd窗口,进入到命令窗口
cd C:\Users\jason\IdeaProjects\KelsenJing
yarn add -D vuepress
npm init -y
创建你的第一篇文档
mkdir docs && echo '### KelsenJing' > docs/README.md在 package.json 中添加一些脚本
{
  "scripts": {
    "docs:dev": "vuepress dev docs",
    "docs:build": "vuepress build docs"
  }
}
idea中,选中docs:dev的绿色小箭头,运行项目

在本地启动服务器也可以用
yarn docs:dev # npm run docs:dev三、主页设置
VuePress 遵循 约定优于配置 的原则,推荐的目录结构如下:
.
├── docs
│   ├── .vuepress (可选的)
│   │   ├── components (可选的)
│   │   ├── theme (可选的)
│   │   │   └── Layout.vue
│   │   ├── public (可选的)
│   │   ├── styles (可选的)
│   │   │   ├── index.styl
│   │   │   └── palette.styl
│   │   ├── templates (可选的, 谨慎配置)
│   │   │   ├── dev.html
│   │   │   └── ssr.html
│   │   ├── config.js (可选的)
│   │   └── enhanceApp.js (可选的)
│   │
│   ├── README.md
│   ├── guide
│   │   └── README.md
│   └── config.md
│
└── package.json
在docs目录中创建配置文件 .vuepress/config.js,目录结构是这样的
.
├─ docs
│  ├─ README.md
│  └─ .vuepress
│     └─ config.js
└─ package.json
config.js内容为
module.exports = {
  title: '勤奋的凯尔森同学',
    description: 'KelsenJing VuePress Site',
}
可以通过 themeConfig.nav 增加一些导航栏链接
// .vuepress/config.js
module.exports = {
  themeConfig: {
    nav: [
      { text: 'Home', link: '/' },
      { text: 'Guide', link: '/guide/' },
      { text: 'External', link: 'https://google.com' },
    ]
  }
}在docs/.vuepress下创建public文件夹,里面存放我们的图片kelsen.png。
把docs/README.md内容替换成下面内容,这里显示的就是主页的内容
---
home: true
title: Home
heroImage: /kelsen.png
heroText: 勤奋的凯尔森同学
tagline: 每一个热爱技术的人,都值得敬畏

actions:
  - text: Get Started
    link: /get-started.html
    type: primary

  - text: Introduction
    link: https://vuejs.press/guide/introduction.html
    type: secondary

features:
  - title: Java后端开发工程师训练营
    details: 从小白到大神的蜕变,由内向外的提升,纯纯的干货.
  - title: 分布式高并发与微服务
    details: SpringBoot、SpringCloud框架,应对高可用高并发应用场景.
  - title: 架构与中间件
    details: 以架构师的眼光看待分布式系统,把握各种中间件的灵活运用.

footer: Copyright © 2024-present KelsenJing All Rights Reserved. | Author KelsenJing
---

This is the content of home page. Check [勤奋的凯尔森同学][default-theme-home] for more details.

[default-theme-home]: https://kelsen.huerpu.cc
3.1首页标题和标语
📁.vuepress文件夹内新建📁public文件夹,放入kelsen.png和favicon.ico文件,heroImage: /kelsen.png设置为kelsen的头像,heroText和tagline分别为首页标题和标语。
重启项目可以看到主页如下

3.2 Logo设置
在themeConfig下增加一个logo的图片路径,该图片存放在public文件夹下。
themeConfig: {
        logo: '/kelsen.png',
}
3.3 站点图标设置
在config.js中增加信息,指向一个美女的图片,图片存在public文件夹下。
export default defineUserConfig({
  head: [['link', { rel: 'icon', href: '/beauty.jpg' }]],
})
显示效果如下

四、导航栏二级菜单
在.vuepress下创建文件夹SpringCloud(Finchley)和SpringCloud(Kilburn),里面存放我们的md文档。
├─.vuepress
│  ├─dist
│  │  └─manifest
│  └─public
├─SpringCloud(Finchley)
└─SpringCloud(Kilburn)
修改themeConfig.nav导航栏,二级菜单就是嵌套两层,也挺简单。
themeConfig: {
        nav: [
            { text: 'Home', link: '/' },
            { text: 'Guide', link: '/guide/' },
            {
                text: 'SpringCloud系列教程',
                items: [
                    {
                        text: 'Spring Cloud(Finchley版本)系列教程',
                        items: [
                            { text: 'Spring Cloud(Finchley版本)系列教程(一) 服务注册与发现(eureka)', link: '/SpringCloud(Finchley)/SpringCloud-(Finchley-version)-series-of-tutorials-(1)-Service-Registration-and-Discovery-(eureka).md' },
                            { text: 'Spring Cloud(Finchley版本)系列教程(二) 客户端负载均衡Ribbon', link: '/SpringCloud(Finchley)/Spring-Cloud-(Finchley-Version)-Series-Tutorial-(2)-Client-Load-Balancing-Ribbon.md' },
                            { text: 'Spring Cloud(Finchley版本)系列教程(三) 服务消费者(OpenFeign)', link: '/SpringCloud(Finchley)/Spring-Cloud-(Finchley-Edition)-Series-Tutorial-(3)-Service-Consumer-(OpenFeign).md' },
                            { text: 'Spring Cloud(Finchley版本)系列教程(四) 断路器(Hystrix)', link: '/SpringCloud(Finchley)/Spring-Cloud-(Finchley-version)-series-tutorial-(4)-Circuit-breaker-(Hystrix).md' },
                            { text: 'Spring Cloud(Finchley版本)系列教程(五) 服务网关(Zuul)', link: '/SpringCloud(Finchley)/SpringCloud-(Finchley-version)-series-of-tutorials-(5)-Service-Gateway-(Zuul).md' },
                        ]
                    },
                    {
                        text: 'Spring Cloud(Kilburn 2022.0.2版本)系列教程',
                        items: [
                            { text: 'Spring Cloud(Kilburn 2022.0.2版本)系列教程(一) 服务注册与发现(eureka)', link: '/SpringCloud(Kilburn)/Spring-Cloud-(Kilburn-2022-0-2-Edition)-Tutorial-Series-(1)-Service-Registration-and-Discovery-(eureka).md' },
                            { text: 'Spring Cloud(Kilburn 2022.0.2版本)系列教程(二) 服务消费者(RestTemplate+Loadbalancer)', link: '/SpringCloud(Kilburn)/Spring-Cloud-(Kilburn-2022-0-2)-Tutorial-Series-(2)-Service-Consumers-(RestTemplate+LoadBalancer).md' },
                            { text: 'Spring Cloud(Kilburn 2022.0.2版本)系列教程(三) 服务消费者(OpenFeign)', link: '/SpringCloud(Kilburn)/Spring-Cloud-(Kilburn-2022-0-2-Edition)-Tutorial-Series-(3)-Service-Consumer-(OpenFeign).md' },
                            { text: 'Spring Cloud(Kilburn 2022.0.2版本)系列教程(四) 断路器(Resilience4JCircuitBreaker、RetryCircuitBreaker)', link: '/SpringCloud(Kilburn)/Spring-Cloud-(Kilburn-2022-0-2-Edition)-Tutorial-Series-(4)-Circuit-Breakers-(Resilience4JCircuitBreaker-RetryCircuit-Breaker).md' },
                            { text: '', link: '/SpringCloud(Kilburn)/' },
                        ]
                    },

                ]
            },
            { text: 'About', link: '/about' },
        ]
    },
重启项目,可以看到二级菜单效果。

五、侧边栏
5.1 docs目录结构
.
├─.vuepress
│  ├─dist
│  │  └─manifest
│  └─public
├─SpringBoot
├─SpringCloud(Finchley)
└─SpringCloud(Kilburn)
5.2 二级目录设置
在themeConfig的nav导航栏中,增加一下SpringBoot整合系列教程二级菜单。在docs下创建SpringBoot文件夹,里面存放对应的md文件,并且在该目录下创建一个README.md的文件。
nav: [
    { text: 'Home', link: '/' },
    { text: 'Guide', link: '/guide/' },
    {
        text: 'SpringCloud系列教程',
        items: [
            {
                text: 'Spring Cloud(Finchley版本)系列教程',
                items: [
                    { text: 'Spring Cloud(Finchley版本)系列教程(一) 服务注册与发现(eureka)', link: '/SpringCloud(Finchley)/Spring-Cloud-(Finchley-version)-series-of-tutorials-(1)-Service-Registration-and-Discovery-(eureka).md' },
                    { text: 'Spring Cloud(Finchley版本)系列教程(二) 客户端负载均衡Ribbon', link: '/SpringCloud(Finchley)/Spring-Cloud-(Finchley-Version)-Series-Tutorial-(2)-Client-Load-Balancing-Ribbon.md' },
                    { text: 'Spring Cloud(Finchley版本)系列教程(三) 服务消费者(OpenFeign)', link: '/SpringCloud(Finchley)/Spring-Cloud-(Finchley-version)-Series-Tutorial-(3)-Service-Consumer-OpenFeign.md' },
                    { text: 'Spring Cloud(Finchley版本)系列教程(四) 断路器(Hystrix)', link: '/SpringCloud(Finchley)/Spring-Cloud-(Finchley-version)-series-tutorial-(4)-Circuit-breaker-(Hystrix).md' },
                    { text: 'Spring Cloud(Finchley版本)系列教程(五) 服务网关(Zuul)', link: '/SpringCloud(Finchley)/Spring-Cloud-(Finchley-version)-series-of-tutorials-(5)-Service-Gateway-(Zuul).md' },
                ]
            },
            {
                text: 'Spring Cloud(Kilburn 2022.0.2版本)系列教程',
                items: [
                    { text: 'Spring Cloud(Kilburn 2022.0.2版本)系列教程(一) 服务注册与发现(eureka)', link: '/SpringCloud(Kilburn)/Spring-Cloud-(Kilburn-2022-0-2-Edition)-Tutorial-Series-(1)-Service-Registration-and-Discovery-(eureka).md' },
                    { text: 'Spring Cloud(Kilburn 2022.0.2版本)系列教程(二) 服务消费者(RestTemplate+Loadbalancer)', link: '/SpringCloud(Kilburn)/Spring-Cloud-(Kilburn-2022-0-2)-Tutorial-Series-(2)-Service-Consumers-(RestTemplate+LoadBalancer).md' },
                    { text: 'Spring Cloud(Kilburn 2022.0.2版本)系列教程(三) 服务消费者(OpenFeign)', link: '/SpringCloud(Kilburn)/Spring-Cloud-(Kilburn-2022-0-2-Edition)-Tutorial-Series-(3)-Service-Consumer-(OpenFeign).md' },
                    { text: 'Spring Cloud(Kilburn 2022.0.2版本)系列教程(四) 断路器(Resilience4JCircuitBreaker、RetryCircuitBreaker)', link: '/SpringCloud(Kilburn)/Spring-Cloud-(Kilburn-2022-0-2-Edition)-Tutorial-Series-(4)-Circuit-Breakers-(Resilience4JCircuitBreaker-RetryCircuit-Breaker).md' },
                    /*{ text: '', link: '/SpringCloud(Kilburn)/' },*/
                ]
            },

        ]
    },
    {
        text: 'SpringBoot整合系列教程',
        items:[
            { text: 'SpringBoot整合MyBatis', link: '/SpringBoot/SpringBoot-integrates-MyBatis' },
            { text: 'SpringBoot整合Redis', link: '/SpringBoot/SpringBoot-integrates-Redis' },
            { text: 'SpringBoot整合es', link: '/SpringBoot/SpringBoot-integrates-es' },
            { text: 'SpringBoot整合thymeleaf', link: '/SpringBoot/SpringBoot-integrates-thymeleaf' },
        ]
    },
    { text: 'About', link: '/about' },
],
5.3 增加侧边栏
在themeConfig中增加sidebar。
sidebar: {

    "/SpringCloud(Finchley)/": [
        '',
        'Spring-Cloud-(Finchley-version)-series-of-tutorials-(1)-Service-Registration-and-Discovery-(eureka)',
        'Spring-Cloud-(Finchley-Version)-Series-Tutorial-(2)-Client-Load-Balancing-Ribbon',
        'Spring-Cloud-(Finchley-version)-Series-Tutorial-(3)-Service-Consumer-OpenFeign',
        'Spring-Cloud-(Finchley-version)-series-tutorial-(4)-Circuit-breaker-(Hystrix)',
        'Spring-Cloud-(Finchley-version)-series-of-tutorials-(5)-Service-Gateway-(Zuul)'
    ],
    "/SpringCloud(Kilburn)/": [
        '',
        'Spring-Cloud-(Kilburn-2022-0-2-Edition)-Tutorial-Series-(1)-Service-Registration-and-Discovery-(eureka)',
        'Spring-Cloud-(Kilburn-2022-0-2)-Tutorial-Series-(2)-Service-Consumers-(RestTemplate+LoadBalancer)',
        'Spring-Cloud-(Kilburn-2022-0-2-Edition)-Tutorial-Series-(3)-Service-Consumer-(OpenFeign)',
        'Spring-Cloud-(Kilburn-2022-0-2-Edition)-Tutorial-Series-(4)-Circuit-Breakers-(Resilience4JCircuitBreaker-RetryCircuit-Breaker)'
    ],
    "/SpringBoot/": [
            '',
            'SpringBoot-integrates-MyBatis',
            'SpringBoot-integrates-es',
            'SpringBoot-integrates-Redis',
            'SpringBoot-integrates-thymeleaf'
     ],
    '/': [
        '',        /* / */
        'contact', /* /contact.html */
        'about'    /* /about.html */
    ]
}
重启项目,可以看到侧边栏效果。但是现在标题只显示到了三级标题。

SpringCloud这边也是只显示到了三级标题。

5.4 多级别侧边栏渲染
在sidebar同级目录下,增加并配置sidebarDepth为6,让它显示的标题多一点。然后在sidebar同级别下增加多级别标题渲染。
markdown: {
    // 开启代码块的行号
    lineNumbers: true,
    // 支持 4 级以上的标题渲染
    extractHeaders: ["h2", "h3", "h4", "h5", "h6"],
},
重启项目,可以看到sidebar可以渲染到6级标题。

SpringCloud这边也可以看到下面的多级标题了。

5.5 侧边栏自动展开
但是我们想让它打开之后,自动展开各种标题,而不是我们点击的时候再打开。在sidebar同级目录下,增加并配置displayAllHeaders为true。

六、更新时间显示调整
在themeConfig中增加一个lastUpdated,指示更新提示内容。
themeConfig: {
        lastUpdated: '最近更新',
}
新增一个包moment。
yarn add moment在config.js中增加下面内容,想要自己的格式可以去moment官网查看。
const moment = require('moment');

module.exports = {
  plugins: [
    [
      '@vuepress/last-updated',
      {
        transformer: (timestamp, lang) => {
          // 不要忘了安装 moment
          const moment = require('moment')
          moment.locale(lang)
          return moment(timestamp).fromNow()
        }
      }
    ]
  ]
}
重启项目,效果如下:

七、部署
7.1 部署到github pages
在项目根目录创建文件deploy.sh,其内容如下。
#!/usr/bin/env sh

# 确保脚本抛出遇到的错误
set -e

# 生成静态文件
npm run docs:build

# 进入生成的文件夹
#cd docs/.vuepress/dist
cd dist

# 如果是发布到自定义域名
# echo 'www.example.com' > CNAME

git init
git add -A
git commit -m 'deploy'

# 如果发布到 https://<USERNAME>.github.io
# git push -f git@github.com:<>/<USERNAME>.github.io.git master

# 如果发布到 https://<USERNAME>.github.io/<REPO>
git push -f git@github.com:jinglisen/Kelsen.git master:gh-pages

cd -
上面文件中,我们有配置生成的文件夹为dist,所以在config.js中增加下面一条路径指定。
export default defineUserConfig({
  dest: 'dist',
})
运行deploy.sh

刚开始打包报错了:
(undefined) assets/js/styles.9f84806b.js from Terser
Error: error:0308010C:digital envelope routines::unsupported
    at new Hash (node:internal/crypto/hash:79:19)
at Object.createHash (node:crypto:139:10)运行报错请参考:https://blog.csdn.net/scholar_man/article/details/134491200
我们增加了这条script:"docs:build": "SET NODE_OPTIONS=--openssl-legacy-provider && vuepress build docs",解决了这个报错。
"scripts": {
    "dev": "SET NODE_OPTIONS=--openssl-legacy-provider && vue-cli-service serve",
    "docs:build": "SET NODE_OPTIONS=--openssl-legacy-provider && vuepress build docs",
    "docs:clean-dev": "vuepress dev docs --clean-cache",
    "docs:dev": "SET NODE_OPTIONS=--openssl-legacy-provider && vuepress dev docs",
    "docs:update-package": "pnpm dlx vp-update",
    "deploy": "bash deploy.sh"
  },
我还试了一下,把node退回到16版本,直接从根本上解决这个包不兼容的问题。


新建一个GitHub Action

这里只需要保持和deploy.sh中push的分支一样就好。其余默认,点击提交。

然后返回settings的pages,点击https://jinglisen.github.io/KelsenJing/就可以访问到了。

页面展示就是这样子的

7.2 自定义域名访问
在deploy.sh中增加echo 'kelsenjing.huerpu.cc' > CNAME。
#!/usr/bin/env sh

# 确保脚本抛出遇到的错误
set -e

# 生成静态文件
npm run docs:build

# 进入生成的文件夹
#cd docs/.vuepress/dist
cd dist

# 如果是发布到自定义域名
echo 'kelsenjing.huerpu.cc' > CNAME

git init
git add -A
git commit -m 'deploy'

# 如果发布到 https://<USERNAME>.github.io
# git push -f git@github.com:<>/<USERNAME>.github.io.git master

# 如果发布到 https://<USERNAME>.github.io/<REPO>
git push -f git@github.com:jinglisen/Kelsen.git master:gh-pages

cd -在域名解析增加一条CNAME的记录,主机记录为kelsen,也就是二级域名,记录值指向jinglisen.github.io.。

在项目的settings中,增加自定义域名kelsenjing.huerpu.cc,添加之后检测DNS check successful。如果域名访问不到,大家耐心等待一下,域名提供商10分钟内生效。

访问https://kelsenjing.huerpu.cc/,可以看到样式都乱掉了,别慌,我们修改一下base。
在config.js中修改base: '/',然后重新deploy发布。

7.3 部署到Ubuntu服务器
sudo su -

apt install  net-tools -y

apt install ssh

cd /usr

mkdir software

chmod -R 777 software

apt install unzip

unzip dist.zip

mv dist/ kelsen/

chmod -R 777 kelsen

#安装nginx
apt install nginx-core -y
#查看nginx版本
nginx -v
#启动nginx
service nginx start
#停止nginx
service nginx stop
#开放80端口,nginx默认端口
ufw allow 80

# 打开默认的 nginx 配置文件
vim /etc/nginx/sites-available/default

#前端访问地址
location / {
                # First attempt to serve request as file, then
                # as directory, then fall back to displaying a 404.
                root /usr/software/kelsen;
                index index.html index.htm;
                try_files $uri $uri/ =404;
}
输入IP地址,可以访问到vuepress部署到Ubuntu首页面。

7.4 内网穿透域名访问
因为我有一台阿里云主机,有做内网穿透,所以直接在frpc.ini中增加一条记录
[hep-vuepress]
type = tcp
local_ip = 192.168.31.116
local_port = 80
remote_port = 80
在阿里云主机安全规则中,放行80端口。
访问http://www.huerpu.cc/即可访问到博客主页啦。

八、Vssue评论插件
8.1 获得clientId和clientSecret
创建一个OAuth App,地址https://vssue.js.org/zh/guide/github.html

这里把本地地址贴进来http://localhost:8080/


8.2 安装使用vssue
安装vssue包和api-github-v4包
yarn add @vssue/vuepress-plugin-vssue

yarn add  @vssue/api-github-v4
在Config.js的plugins中增加vssue
//个人的仅供参考,需要更换成自己github的OAuth App clientId和clientSecret
[
            '@vssue/vuepress-plugin-vssue', {
                // 设置 `platform` 而不是 `api`
                platform: 'github-v4',

                // 其他的 Vssue 配置
                owner: 'jinglisen',
                repo: 'KelsenJing',
                clientId: 'Ov23li40sj0Aqfpe44n5',
                clientSecret: 'ea2132d27d6f922adce20aca49639bd3abea7190',
            },
],
8.3 单页面使用vssue
在我们的docs下有一个about页面,在about中添加一个<Vssue />标签
### About Me

一个喜欢英语的程序猿

<Vssue  />
重启项目,可以看到有评论效果


8.4 自动创建评论功能
在vssue中设置自动创建评论autoCreateIssue: true,即可
//个人的仅供参考,需要更换成自己github的OAuth App clientId和clientSecret
[
            '@vssue/vuepress-plugin-vssue', {
                // 设置 `platform` 而不是 `api`
                platform: 'github-v4',

                // 其他的 Vssue 配置
                owner: 'jinglisen',
                repo: 'KelsenJing',
                clientId: 'Ov23li40sj0Aqfpe44n5',
                clientSecret: 'ea2132d27d6f922adce20aca49639bd3abea7190',
                autoCreateIssue: true,
            },
],在about同级目录下,创建一个about1.md文件,重启项目,访问http://localhost:8080/about1.html,可以看到不需要创建,评论已经自动创建了。github对应项目中,也有了对应的about1的评论。


8.5 全局设置Vssue
如果在每一个页面都去添加一个<Vssue/>标签也太麻烦了,我们希望vuepress可以帮我们自动添加上去。
8.5.1 主题的继承准备工作
去vuepress的github下载源码https://github.com/vuejs/vuepress,把路径/vuepress-master/packages/@vuepress/theme-default下,layouts和util拷贝出来,存放目录如下:

在theme文件夹下,创建一个index.js其内容如下:
// .vuepress/theme/index.js
module.exports = {
    extend: '@vuepress/theme-default'
}
为了方便起见,把代码贴出来吧。
util/index.js如下:
export const hashRE = /#.*$/
export const extRE = /\.(md|html)$/
export const endingSlashRE = /\/$/
export const outboundRE = /^[a-z]+:/i

export function normalize (path) {
  return decodeURI(path)
    .replace(hashRE, '')
    .replace(extRE, '')
}

export function getHash (path) {
  const match = path.match(hashRE)
  if (match) {
    return match[0]
  }
}

export function isExternal (path) {
  return outboundRE.test(path)
}

export function isMailto (path) {
  return /^mailto:/.test(path)
}

export function isTel (path) {
  return /^tel:/.test(path)
}

export function ensureExt (path) {
  if (isExternal(path)) {
    return path
  }
  const hashMatch = path.match(hashRE)
  const hash = hashMatch ? hashMatch[0] : ''
  const normalized = normalize(path)

  if (endingSlashRE.test(normalized)) {
    return path
  }
  return normalized + '.html' + hash
}

export function isActive (route, path) {
  const routeHash = decodeURIComponent(route.hash)
  const linkHash = getHash(path)
  if (linkHash && routeHash !== linkHash) {
    return false
  }
  const routePath = normalize(route.path)
  const pagePath = normalize(path)
  return routePath === pagePath
}

export function resolvePage (pages, rawPath, base) {
  if (isExternal(rawPath)) {
    return {
      type: 'external',
      path: rawPath
    }
  }
  if (base) {
    rawPath = resolvePath(rawPath, base)
  }
  const path = normalize(rawPath)
  for (let i = 0; i < pages.length; i++) {
    if (normalize(pages[i].regularPath) === path) {
      return Object.assign({}, pages[i], {
        type: 'page',
        path: ensureExt(pages[i].path)
      })
    }
  }
  console.error(`[vuepress] No matching page found for sidebar item "${rawPath}"`)
  return {}
}

function resolvePath (relative, base, append) {
  const firstChar = relative.charAt(0)
  if (firstChar === '/') {
    return relative
  }

  if (firstChar === '?' || firstChar === '#') {
    return base + relative
  }

  const stack = base.split('/')

  // remove trailing segment if:
  // - not appending
  // - appending to trailing slash (last segment is empty)
  if (!append || !stack[stack.length - 1]) {
    stack.pop()
  }

  // resolve relative path
  const segments = relative.replace(/^\//, '').split('/')
  for (let i = 0; i < segments.length; i++) {
    const segment = segments[i]
    if (segment === '..') {
      stack.pop()
    } else if (segment !== '.') {
      stack.push(segment)
    }
  }

  // ensure leading slash
  if (stack[0] !== '') {
    stack.unshift('')
  }

  return stack.join('/')
}

/**
 * @param { Page } page
 * @param { string } regularPath
 * @param { SiteData } site
 * @param { string } localePath
 * @returns { SidebarGroup }
 */
export function resolveSidebarItems (page, regularPath, site, localePath) {
  const { pages, themeConfig } = site

  const localeConfig = localePath && themeConfig.locales
    ? themeConfig.locales[localePath] || themeConfig
    : themeConfig

  const pageSidebarConfig = page.frontmatter.sidebar || localeConfig.sidebar || themeConfig.sidebar
  if (pageSidebarConfig === 'auto') {
    return resolveHeaders(page)
  }

  const sidebarConfig = localeConfig.sidebar || themeConfig.sidebar
  if (!sidebarConfig) {
    return []
  } else {
    const { base, config } = resolveMatchingConfig(regularPath, sidebarConfig)
    if (config === 'auto') {
      return resolveHeaders(page)
    }
    return config
      ? config.map(item => resolveItem(item, pages, base))
      : []
  }
}

/**
 * @param { Page } page
 * @returns { SidebarGroup }
 */
function resolveHeaders (page) {
  const headers = groupHeaders(page.headers || [])
  return [{
    type: 'group',
    collapsable: false,
    title: page.title,
    path: null,
    children: headers.map(h => ({
      type: 'auto',
      title: h.title,
      basePath: page.path,
      path: page.path + '#' + h.slug,
      children: h.children || []
    }))
  }]
}

export function groupHeaders (headers) {
  // group h3s under h2
  headers = headers.map(h => Object.assign({}, h))
  let lastH2
  headers.forEach(h => {
    if (h.level === 2) {
      lastH2 = h
    } else if (lastH2) {
      (lastH2.children || (lastH2.children = [])).push(h)
    }
  })
  return headers.filter(h => h.level === 2)
}

export function resolveNavLinkItem (linkItem) {
  return Object.assign(linkItem, {
    type: linkItem.items && linkItem.items.length ? 'links' : 'link'
  })
}

/**
 * @param { Route } route
 * @param { Array<string|string[]> | Array<SidebarGroup> | [link: string]: SidebarConfig } config
 * @returns { base: string, config: SidebarConfig }
 */
export function resolveMatchingConfig (regularPath, config) {
  if (Array.isArray(config)) {
    return {
      base: '/',
      config: config
    }
  }
  for (const base in config) {
    if (ensureEndingSlash(regularPath).indexOf(encodeURI(base)) === 0) {
      return {
        base,
        config: config[base]
      }
    }
  }
  return {}
}

function ensureEndingSlash (path) {
  return /(\.html|\/)$/.test(path)
    ? path
    : path + '/'
}

function resolveItem (item, pages, base, groupDepth = 1) {
  if (typeof item === 'string') {
    return resolvePage(pages, item, base)
  } else if (Array.isArray(item)) {
    return Object.assign(resolvePage(pages, item[0], base), {
      title: item[1]
    })
  } else {
    const children = item.children || []
    if (children.length === 0 && item.path) {
      return Object.assign(resolvePage(pages, item.path, base), {
        title: item.title
      })
    }
    return {
      type: 'group',
      path: item.path,
      title: item.title,
      sidebarDepth: item.sidebarDepth,
      initialOpenGroupIndex: item.initialOpenGroupIndex,
      children: children.map(child => resolveItem(child, pages, base, groupDepth + 1)),
      collapsable: item.collapsable !== false
    }
  }
}Layout.vue代码如下:
<template>
    <div
            class="theme-container"
            :class="pageClasses"
            @touchstart="onTouchStart"
            @touchend="onTouchEnd"
    >
        <Navbar
                v-if="shouldShowNavbar"
                @toggle-sidebar="toggleSidebar"
        />

        <div
                class="sidebar-mask"
                @click="toggleSidebar(false)"
        />

        <Sidebar
                :items="sidebarItems"
                @toggle-sidebar="toggleSidebar"
        >
            <template #top>
                <slot name="sidebar-top" />
            </template>
            <template #bottom>
                <slot name="sidebar-bottom" />
            </template>
        </Sidebar>

        <Home v-if="$page.frontmatter.home" />

        <Page
                v-else
                :sidebar-items="sidebarItems"
        >
            <template #top>
                <slot name="page-top" />
            </template>
            <template #bottom>
                <slot name="page-bottom" />
            </template>
        </Page>
    </div>
</template>

<script>
import Home from '@theme/components/Home.vue'
import Navbar from '@theme/components/Navbar.vue'
import Page from '@theme/components/Page.vue'
import Sidebar from '@theme/components/Sidebar.vue'
import { resolveSidebarItems } from '../util'

export default {
    name: 'Layout',

    components: {
        Home,
        Page,
        Sidebar,
        Navbar
    },

    data () {
        return {
            isSidebarOpen: false
        }
    },

    computed: {
        shouldShowNavbar () {
            const { themeConfig } = this.$site
            const { frontmatter } = this.$page
            if (
                frontmatter.navbar === false
                || themeConfig.navbar === false) {
                return false
            }
            return (
                this.$title
                || themeConfig.logo
                || themeConfig.repo
                || themeConfig.nav
                || this.$themeLocaleConfig.nav
            )
        },

        shouldShowSidebar () {
            const { frontmatter } = this.$page
            return (
                !frontmatter.home
                && frontmatter.sidebar !== false
                && this.sidebarItems.length
            )
        },

        sidebarItems () {
            return resolveSidebarItems(
                this.$page,
                this.$page.regularPath,
                this.$site,
                this.$localePath
            )
        },

        pageClasses () {
            const userPageClass = this.$page.frontmatter.pageClass
            return [
                {
                    'no-navbar': !this.shouldShowNavbar,
                    'sidebar-open': this.isSidebarOpen,
                    'no-sidebar': !this.shouldShowSidebar
                },
                userPageClass
            ]
        }
    },

    mounted () {
        this.$router.afterEach(() => {
            this.isSidebarOpen = false
        })
    },

    methods: {
        toggleSidebar (to) {
            this.isSidebarOpen = typeof to === 'boolean' ? to : !this.isSidebarOpen
            this.$emit('toggle-sidebar', this.isSidebarOpen)
        },

        // side swipe
        onTouchStart (e) {
            this.touchStart = {
                x: e.changedTouches[0].clientX,
                y: e.changedTouches[0].clientY
            }
        },

        onTouchEnd (e) {
            const dx = e.changedTouches[0].clientX - this.touchStart.x
            const dy = e.changedTouches[0].clientY - this.touchStart.y
            if (Math.abs(dx) > Math.abs(dy) && Math.abs(dx) > 40) {
                if (dx > 0 && this.touchStart.x <= 80) {
                    this.toggleSidebar(true)
                } else {
                    this.toggleSidebar(false)
                }
            }
        }
    }
}
</script>
此时重启项目,没有报错,正常运行的。
8.5.2 设置全局自动添加Vssue标签
在Layout.vue中的Page标签,找到bottom,添加一行代码<Vssue class="theme-default-content content__default" :options="{ locale: 'zh' }" />。
<Page
        v-else
        :sidebar-items="sidebarItems"
>
    <template #top>
        <slot name="page-top" />
    </template>
    <template #bottom>
        <slot name="page-bottom" />
        <Vssue class="theme-default-content content__default" :options="{ locale: 'zh' }" />
    </template>
</Page>
重启项目,可以看到每个页面有自动有一个Vssue的评论。

github对应项目中,也有了对应的文章的评论。

8.6 隐藏敏感信息
现在有个致命的问题就是,我这个项目必须是public的,这个评论才生效,而且是本地运行生效。我们想让它可以在www.huerpu.cc下生效,并且提交到GitHub的文档不让别人看到。
首先把这俩地方改成自己的域名,这样就可以在外网生效评论功能了。

其次,创建一个名为KelsenComment空的GitHub仓库,并且为public,这时候就可以把KelsenJing仓库设置为private的了。
最后,把插件配置里repo改成KelsenComment,即可。
[
            '@vssue/vuepress-plugin-vssue', {
                // 设置 `platform` 而不是 `api`
                platform: 'github-v4',

                // 其他的 Vssue 配置
                owner: 'jinglisen',
                repo: 'KelsenComment',
                clientId: 'Ov23li40sj0Aqfpe44n5',
                clientSecret: 'ea2132d27d6f922adce20aca49639bd3abea7190',
                autoCreateIssue: true,
            },
],这个KelsenComment仓库啥都没有,就只有评论issue信息。原有的KelsenJing仓库是私有的,你可以随便提交任何敏感信息了。

九、back-to-top
安装一下plugin-back-to-top插件,然后在config.js中增加该插件。
yarn add -D @vuepress/plugin-back-to-top

module.exports = {
  plugins: ['@vuepress/back-to-top']
}
重启项目,可以看到这篇文章很长,这里就有一个向上的绿色小箭头,点击就可以回到顶部。

十、添加谷歌分析
10.1 安装谷歌分析插件
下载安装@vuepress/plugin-google-analytics插件,并在config.js中引入插件。其中的ga下面有介绍。
yarn add -D @vuepress/plugin-google-analytics

module.exports = {
  plugins: [
    [
      '@vuepress/google-analytics',
      {
        'ga': 'G-VW5HQQV415' // UA-00000000-0
      }
    ]
  ]
}
10.2 获取谷歌分析衡量ID
谷歌分析地址https://analytics.google.com/。

新建一个谷歌分析账号,这里的衡量ID用于上面代码的ga字段以及js中的那串字符。点击查看代码说明。

10.3 head添加谷歌分析代码
把这一段代码拷贝出来

在config.js的head中,增加刚拷贝的代码。其中的G-195NQR6PDD替换成自己的谷歌分析中的衡量ID。
head: [
        ['script', { src: 'https://www.googletagmanager.com/gtag/js?id=G-195NQR6PDD' }],
        // google统计
        [
            "script",
            {},
            `
            window.dataLayer = window.dataLayer || [];
            function gtag(){dataLayer.push(arguments);}
            gtag('js', new Date());

            gtag('config', 'G-195NQR6PDD');
            `,
        ],
],
重新部署好项目,点击这里的测试,可以看到绿色的箭头,证明谷歌分析生效了。

回到首页,可以看到有一个用户访问过,这是因为我刚刚点击了这个博客网站。

十一、添加百度分析
11.1 添加百度统计
在百度统计账号中,选择新增网站。

填入你的域名与网站信息。

把这里的代码复制下来。

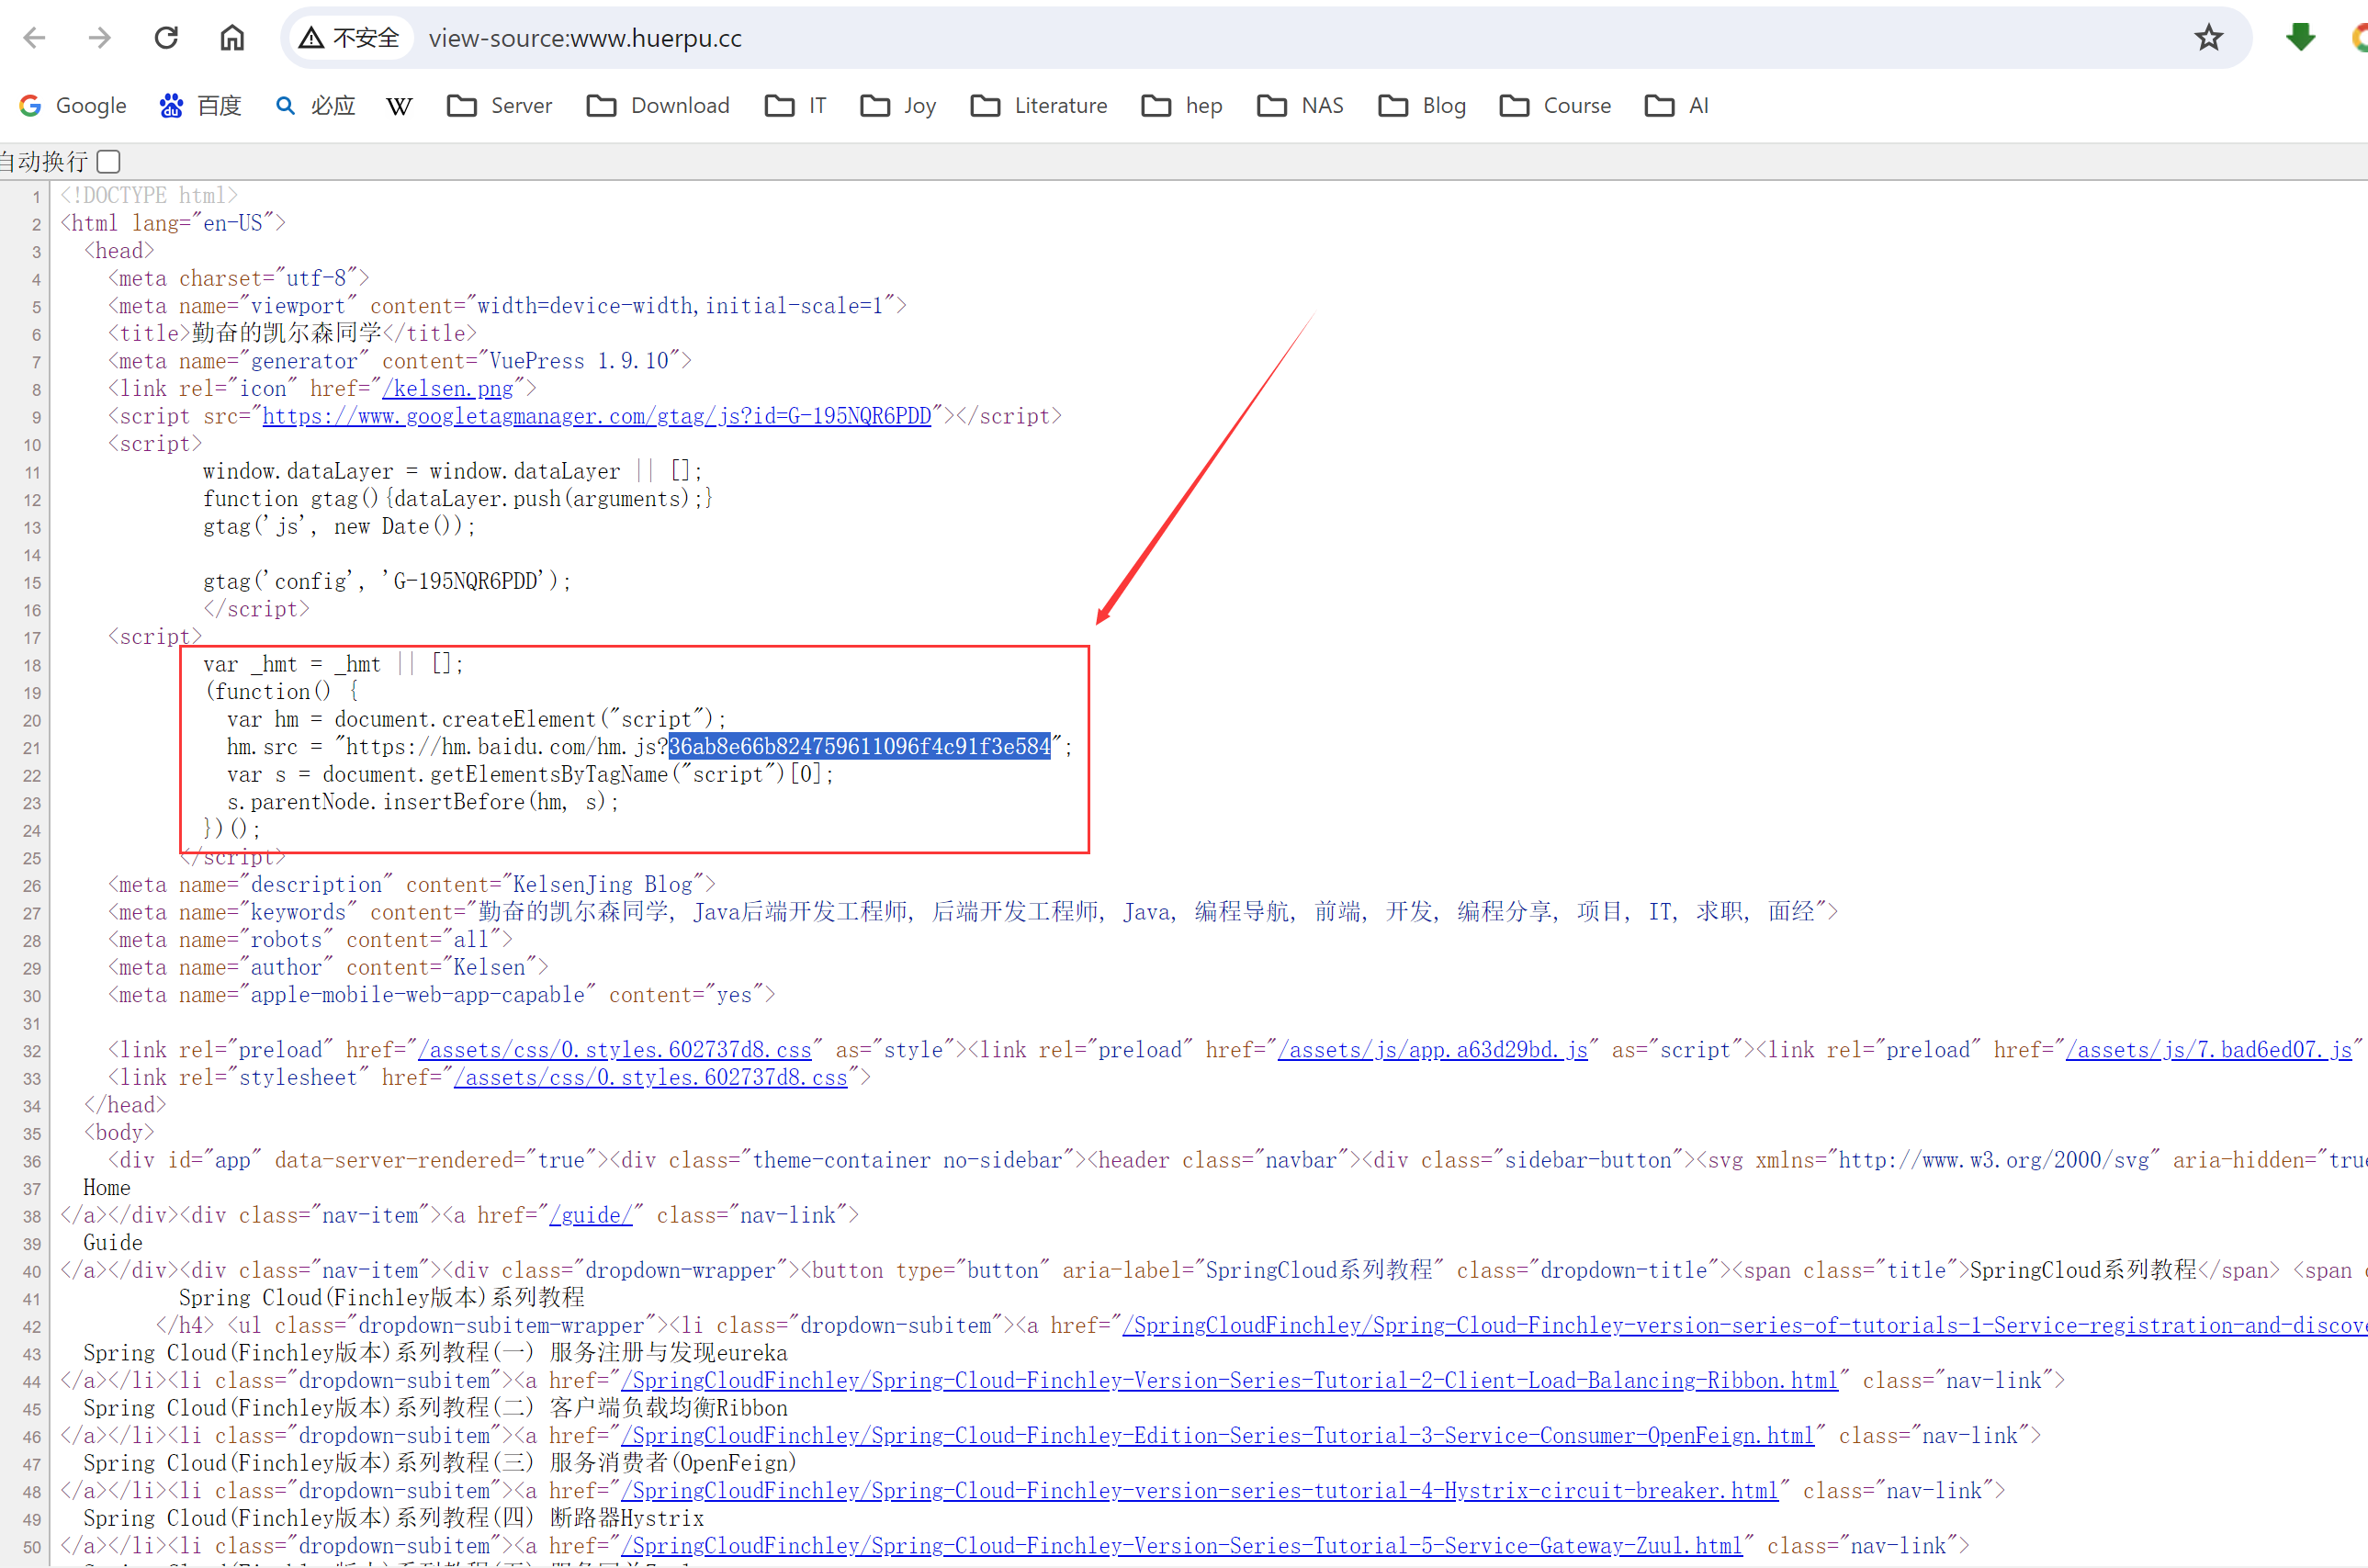
把代码放入config.js中的head,重新部署即可。多简单。
// 百度统计
[
    "script",
    {},
    `
    var _hmt = _hmt || [];
    (function() {
      var hm = document.createElement("script");
      hm.src = "https://hm.baidu.com/hm.js?36ab8e66b824759611096f4c91f3e584";
      var s = document.getElementsByTagName("script")[0];
      s.parentNode.insertBefore(hm, s);
    })();
  `,
],
重新部署之后,访问网页,查看源码,可以看到这段代码已经有了。
添加好了之后立马去看是没有效果的,下面是第二天去看的时候的统计,可以看到有一点点数据了。

11.2 为每个页面添加百度统计
百度统计添加, 考虑在每个页面点击时作记录,在theme/enhanceApp.js中拦截router,
export default ({router}) => {
    router.beforeEach((to, from, next) => {
        //对每个页面点击添加百度统计
        if(typeof _hmt!='undefined'){
            if (to.path) {
                _hmt.push(['_trackPageview', to.fullPath]);
            }
        }

        // continue
        next();
    })
};
11.3 添加百度站点自动推送
yarn add -D vuepress-plugin-baidu-autopush

module.exports = {
  plugins: [
    'vuepress-plugin-baidu-autopush'
  ]
};
十二、config.js拆分
随着项目的逐步扩大,config.js后面会爆炸式增长,为了方便使用,我们把config.js分割一下,弄成几个单独的文件进行使用。
//.vuepress目录下的文件结构
│  config.js
│
├─config
│      headConfig.js
│      navConfig.js
│      pluginsConfig.js
│      sidebarConfig.js
│
├─public
│      beauty.jpg
│      favicon.ico
│      kelsen.png
│
└─theme
    │  index.js
    │
    ├─layouts
    │      Layout.vue
    │
    └─util
index.js在.vuepress目录下创建config文件夹,该文件夹下创建headConfig.js、navConfig.js、pluginsConfig.js、sidebarConfig.js。
headConfig.js
module.exports = [
    ['link', { rel: 'icon', href: '/kelsen.png' }],
    // SEO
    [
        "meta",
        {
            name: "keywords",
            content:
                "勤奋的凯尔森同学, Java后端开发工程师, 后端开发工程师, Java, 编程导航, 前端, 开发, 编程分享, 项目, IT, 求职, 面经",
        },
    ],
    ["meta", {name: "robots", content: "all"}],
    ["meta", {name: "author", content: "Kelsen"}],
    ["meta", {name: "apple-mobile-web-app-capable", content: "yes"}],
    ['script', { src: 'https://www.googletagmanager.com/gtag/js?id=G-195NQR6PDD' }],
    // google统计
    [
        "script",
        {},
        `
            window.dataLayer = window.dataLayer || [];
            function gtag(){dataLayer.push(arguments);}
            gtag('js', new Date());

            gtag('config', 'G-195NQR6PDD');
            `,
    ],

    // 百度统计
    [
        "script",
        {},
        `
            var _hmt = _hmt || [];
            (function() {
              var hm = document.createElement("script");
              hm.src = "https://hm.baidu.com/hm.js?36ab8e66b824759611096f4c91f3e584";
              var s = document.getElementsByTagName("script")[0];
              s.parentNode.insertBefore(hm, s);
            })();
          `,
    ],

]
navConfig.js
module.exports = [
    { text: 'Home', link: '/' },
    { text: 'Guide', link: '/guide/' },
    {
        text: 'SpringCloud系列教程',
        items: [
            {
                text: 'Spring Cloud(Finchley版本)系列教程',
                items: [
                    { text: 'Spring Cloud(Finchley版本)系列教程(一) 服务注册与发现eureka', link: '/SpringCloudFinchley/Spring-Cloud-Finchley-version-series-of-tutorials-1-Service-registration-and-discovery-eureka.md' },
                    { text: 'Spring Cloud(Finchley版本)系列教程(二) 客户端负载均衡Ribbon', link: '/SpringCloudFinchley/Spring-Cloud-Finchley-Version-Series-Tutorial-2-Client-Load-Balancing-Ribbon.md' },
                    { text: 'Spring Cloud(Finchley版本)系列教程(三) 服务消费者(OpenFeign)', link: '/SpringCloudFinchley/Spring-Cloud-Finchley-Edition-Series-Tutorial-3-Service-Consumer-OpenFeign.md' },
                    { text: 'Spring Cloud(Finchley版本)系列教程(四) 断路器Hystrix', link: '/SpringCloudFinchley/Spring-Cloud-Finchley-version-series-tutorial-4-Hystrix-circuit-breaker.md' },
                    { text: 'Spring Cloud(Finchley版本)系列教程(五) 服务网关Zuul', link: '/SpringCloudFinchley/Spring-Cloud-Finchley-Version-Series-Tutorial-5-Service-Gateway-Zuul.md' },
                ]
            },
            {
                text: 'Spring Cloud(Kilburn 2022.0.2版本)系列教程',
                items: [
                    { text: 'Spring Cloud(Kilburn 2022.0.2版本)系列教程(一) 服务注册与发现eureka', link: '/SpringCloudKilburn/Spring-Cloud-Kilburn-2022-Edition-Tutorial-Series-1-Service-Registration-and-Discovery-Eureka.md' },
                    { text: 'Spring Cloud(Kilburn 2022.0.2版本)系列教程(二) 服务消费者(RestTemplate+Loadbalancer)', link: '/SpringCloudKilburn/Spring-Cloud-Kilburn-2022-Tutorial-Series-2-Service-Consumers-RestTemplate-LoadBalancer.md' },
                    { text: 'Spring Cloud(Kilburn 2022.0.2版本)系列教程(三) 服务消费者(OpenFeign)', link: '/SpringCloudKilburn/Spring-Cloud-Kilburn-2022-Tutorial-Series-3-Service-Consumer-OpenFeign.md' },
                    { text: 'Spring Cloud(Kilburn 2022.0.2版本)系列教程(四) 断路器(Resilience4JCircuitBreaker、RetryCircuitBreaker)', link: '/SpringCloudKilburn/Spring-Cloud-Kilburn-2022-Tutorial-Series-4-Circuit-Breakers-Resilience4JCircuitBreaker-RetryCircuit-Breaker.md' },
                ]
            },

        ]
    },
    {
        text: 'SpringBoot整合系列教程',
        items:[
            { text: 'SpringBoot整合MyBatis', link: '/SpringBoot/SpringBoot-integrates-MyBatis' },
            { text: 'SpringBoot整合Redis', link: '/SpringBoot/SpringBoot-integrates-Redis' },
            { text: 'SpringBoot整合es', link: '/SpringBoot/SpringBoot-integrates-es' },
            { text: 'SpringBoot整合thymeleaf', link: '/SpringBoot/SpringBoot-integrates-thymeleaf' },
        ]
    },
    { text: 'About', link: '/about' },
]
pluginsConfig.js
const moment = require('moment');

module.exports = [
    [
        '@vuepress/last-updated',
        {
            transformer: (timestamp, lang) => {
                // 不要忘了安装 moment
                const moment = require('moment')
                moment.locale('zh-cn')
                return moment(timestamp).format("LLL")
            }
        }
    ],

    [
        '@vssue/vuepress-plugin-vssue', {
        // 设置 `platform` 而不是 `api`
        platform: 'github-v4',

        // 其他的 Vssue 配置
        owner: 'jinglisen',
        repo: 'KelsenJing',
        clientId: 'Ov23li40sj0Aqfpehqn5',
        clientSecret: 'ea2132d27d6f9a1adce20aca49639bd3abea7190',
        autoCreateIssue: true,
    },
    ],

    ['@vuepress/back-to-top'],

    [
        '@vuepress/google-analytics',
        {
            'ga': 'G-195NQR6PDD' // UA-00000000-0
        }
    ],

]
sidebarConfig.js
module.exports = {
    "/SpringCloudFinchley/": [
        'Spring-Cloud-Finchley-version-series-of-tutorials-1-Service-registration-and-discovery-eureka',
        'Spring-Cloud-Finchley-Version-Series-Tutorial-2-Client-Load-Balancing-Ribbon',
        'Spring-Cloud-Finchley-Edition-Series-Tutorial-3-Service-Consumer-OpenFeign',
        'Spring-Cloud-Finchley-version-series-tutorial-4-Hystrix-circuit-breaker',
        'Spring-Cloud-Finchley-Version-Series-Tutorial-5-Service-Gateway-Zuul'
    ],
    "/SpringCloudKilburn/": [
        'Spring-Cloud-Kilburn-2022-Edition-Tutorial-Series-1-Service-Registration-and-Discovery-Eureka',
        'Spring-Cloud-Kilburn-2022-Tutorial-Series-2-Service-Consumers-RestTemplate-LoadBalancer',
        'Spring-Cloud-Kilburn-2022-Tutorial-Series-3-Service-Consumer-OpenFeign',
        'Spring-Cloud-Kilburn-2022-Tutorial-Series-4-Circuit-Breakers-Resilience4JCircuitBreaker-RetryCircuit-Breaker',
    ],
    "/SpringBoot/": [
        'SpringBoot-integrates-MyBatis',
        'SpringBoot-integrates-es',
        'SpringBoot-integrates-Redis',
        'SpringBoot-integrates-thymeleaf'
    ]
}
config.js中导入四个js文件
const headConf = require('./config/headConfig');
const navConfig = require('./config/navConfig');
const sidebarConfig = require('./config/sidebarConfig');
const pluginsConfig = require('./config/pluginsConfig');
并在四个配置项的对应位置,做变量替换引用。
head: headConf,
nav: navConfig,
sidebar: sidebarConfig,
plugins: pluginsConfig,
最终的config.js文件如下,是不是清爽了许多。
const headConf = require('./config/headConfig');
const navConfig = require('./config/navConfig');
const sidebarConfig = require('./config/sidebarConfig');
const pluginsConfig = require('./config/pluginsConfig');

module.exports = {
    lang: 'en-zh',
    title: '勤奋的凯尔森同学',
    description: 'KelsenJing Blog',
    base: "/",
    dest: 'dist',

    head: headConf,

    themeConfig: {
        logo: '/kelsen.png',
        lastUpdated: '最近更新',
        nav: navConfig,
        sidebarDepth: 6,
        displayAllHeaders: true,
        sidebar: sidebarConfig,

    },

    markdown: {
        // 开启代码块的行号
        lineNumbers: true,
        // 支持 4 级以上的标题渲染
        extractHeaders: ["h2", "h3", "h4", "h5", "h6"],
    },

    plugins: pluginsConfig,

}
十三、图片自动缩放插件
安装插件,并在plugins中引入。
yarn add -D @vuepress/plugin-medium-zoom

module.exports = {
  plugins: ['@vuepress/medium-zoom']
}
把鼠标放在图片上,会有一个十字型的标识,点击就可以放大图片。

十四、侧边栏菜单选中插件
页面滚动时自动激活侧边栏链接的插件
yarn add -D @vuepress/plugin-active-header-links

module.exports = {
  plugins: ['@vuepress/active-header-links']
}
在阅读的过程中,侧边栏会根据你的阅读速度,选中当前的阅读目录,变成绿色的,指示你阅读到的当前位置。

十五、中文标签或其他路径引发的404问题
如果Markdown文件名有中文字符或者特殊字符,会引发找不到文件路径的问题,我们解决一下。修改Layout.vue中的mounted()方法,修改成下面的。
mounted() {
        let routes = [this.$author._metaMap, this.$tag._metaMap],
            routeList = []; // 将所有包含中文需要重新匹配的 router path 写入一个数组中
        routes.forEach((route) => { // 遍历将对象糅合成一个数组
            Object.keys(route).forEach((key) => {
                routeList.push(route[key].path);
            });
        });
        if(routeList.includes(this.$route.params.pathMatch)){ // 判断是否存在当前 route ,存在则跳转
            this.$router.push(this.$route.params.pathMatch)
        }
},
把文档路径改成有特殊字符&、空格、括号等,都可以正确定位到md文档路径。


参考于https://110501.com/2021/05/06/support-chinese-tags-on-vuepress/
十六、添加禁止网页内容复制
可以设置别人不能复制你的网页内容,或者限制复制的长度。
yarn  add vuepress-plugin-copyright

module.exports = {
  plugins: [
    [
        'copyright',
        {
            // 更多配置项以及配置项说明上 https://github.com/vuepress/vuepress-plugin-copyright 查看
            noCopy: false, // 是否禁止复制
            minLength: 150,  // 触发剪贴板组件或noCopy效果的最小文本长度
            disabled: true,  // 是否默认禁用这个插件的功能
            noSelect: true, // 是否禁止选择
            authorName: {
                'zh-CN': '勤奋的凯尔森同学',
                'en-US': 'Kelsen',
            },
        },
    ],
  ],
}
十七、添加代码拷贝
做为程序员的网站,代码拷贝是必须的。
yarn add -D  vuepress-plugin-code-copy

module.exports = {
    plugins: [['vuepress-plugin-code-copy', true]]
}
会有一个拷贝的小图标。

十八、右侧边栏设置悬浮窗
在config文件夹下增加extraSideBar.js
module.exports = [
    {
        title: "公众号",
        icon: "/icon/gongzhonghao.png",
        popoverTitle: "欢迎关注勤奋的凯尔森同学微信公众号",
        popoverUrl:
            "/gongzhonghao.jpg",
        popoverDesc: "关注公众号查看更多内容",
    },
    {
        title: "微博",
        icon: "/icon/WeiBo.png",
        popoverTitle:
            '<span style="font-size:0.8rem;font-weight:bold;"><span style="color:red;">扫码关注</span>精彩生活尽在此</span>',
        popoverUrl:
            "/WeiBo.jpg",
        popoverDesc: "分享日常,与你共同成长",
    },
    {
        title: "交流群",
        icon: "/icon/weixin.png",
        popoverTitle:
            '<span style="font-size:0.8rem;font-weight:bold;">扫码添加 <span style="color:red;">凯尔森小助手微信</span>,拉你进交流群</span>',
        popoverUrl:
            "/WeChat.jpg",
    },
    {
        title: "读书会",
        icon: "/icon/Reading.png",
        popoverTitle:
            '<span style="font-size:0.8rem;font-weight:bold;">扫码添加,回复<span style="color:red;">阅读</span>拉你进读书群</span>',
        popoverUrl: "/WeChat.jpg",

    },
    {
        title: "支持我",
        icon: "/icon/SupportMe.png",
        popoverTitle:
            ' <span style="font-size:0.8rem;font-weight:bold;">鼓励和赞赏我</span>',
        popoverUrl:
            "/SupportMe.jpg",
        popoverDesc:
            "感谢您的支持,万分感谢",
    },
];
在config.js中配置extraSideBar
const extraSideBar = require('./config/extraSideBar');
themeConfig: {
        extraSideBar: extraSideBar,
},
在Layout.vue中增加配置
<Page
            v-else
            :sidebar-items="sidebarItems"
            :page-sidebar-items="pageSidebarItems"
        >
    <template #top>
        <slot name="page-top" />

    </template>
    <template #bottom>
        <slot name="page-bottom" />
        <Footer />
    </template>
</Page>

<PageSidebar
            v-if="shouldShowPageSidebar"
            :page-sidebar-items="pageSidebarItems"
            :sidebar-items="sidebarItems"
        >
</PageSidebar>
<script>
import PageSidebar from '@theme/components/ExtraSidebar.vue'
import { resolveSidebarItems, resolveHeaders } from '../util'
components: { Home, Page, Sidebar, Navbar, PageSidebar },
shouldShowPageSidebar (){
    const { frontmatter } = this.$page

    return (//false&&
        !frontmatter.home
        && frontmatter.sidebar !== false
        && this.pageSidebarItems.length
    )
},
pageSidebarItems () {
        return resolveHeaders(this.$page)
},
</script>
在theme下的index.js修改一下这个函数,增加一个关键字export。
export function resolveHeaders (page) {
  const headers = groupHeaders(page.headers || [])
  return [{
    type: 'group',
    collapsable: false,
    title: page.title,
    path: null,
    children: headers.map(h => ({
      type: 'auto',
      title: h.title,
      basePath: page.path,
      path: page.path + '#' + h.slug,
      children: h.children || []
    }))
  }]
}在theme下创建文件夹components,并在此文件夹下创建Page.vue和ExtraSidebar.vue。
Page.vue
<template>
  <main class="page">
    <slot name="top" />
      <div class="content">
          <div style="width:100%">
              <Content class="theme-default-content custom-content"  />
              <PageEdit style="margin: 0"/>

              <PageNav v-bind="{ sidebarItems }" />
          </div>

      </div>

    <slot name="bottom" />
  </main>
</template>

<script>
import PageEdit from '@theme/components/PageEdit.vue'
import PageNav from '@theme/components/PageNav.vue'

export default {
  components: { PageEdit, PageNav },
  props: ['sidebarItems', 'pageSidebarItems'],
  mounted() {
    console.log(this.$site,this, 'this.$site')
  }
}
</script>

<style lang="stylus">
@require '../styles/wrapper.styl'

@media (max-width: 1435px)
  .toc-container-sidebar
    display none !important

@media (max-width: $MQMobile)
  .toc-container-sidebar
    display none
.content-page
  position relative
.custom-content
  padding-right 16px !important
.content
  display flex
  justify-content space-around
  margin 0 auto
  li, a , p, span
    word-wrap break-word
.theme-default-content
  margin 0 !important

.page
  display block
  position relative
  //height 100vw
  //width 100vw
  //overflow scroll
.toc-container-sidebar

  order 2
  width 100%
  flex-grow 1
  //padding-left 32px
  display: block;
  position: relative;
  color $textColor
  //: calc(100vw - 460px);
  top: 80px;
  max-width: 240px;
  background transparent
  margin-right: 10px;
  margin-left: 0;
  .on
    display: block;
  .pos-box
    position: fixed;
    padding: 16px;
    top 80px;
    height 100vh
    overflow-x hidden
    overflow-y auto

    .icon-arrow
      position: relative;
      margin-left: -20px;
    .scroll-box
      overflow-x: hidden;
      overflow-y: hidden;
      & > div:first-child
        overflow-x scroll
        white-space: nowrap;
        text-overflow ellipsis
      hr
        margin-top: 0.5rem
      .toc-box
        max-height:81vh;
        verflow-y: auto;
        overflow-x: hidden;
        width: 238px;
        padding-right: 16px;
        -webkit-box-sizing: border-box;
        box-sizing: border-box;
      & > ol
        margin-top: -8px;
        li
          margin-top: 8px;
          line-height: 17px;
          text-align: left;
          overflow: auto;
          text-overflow: ellipsis;
          font-size: 12px;
          white-space: nowrap;
        .sub-box
          margin-top: 0;
        & > ol > li
          padding-left: 15px;

</style>
ExtraSidebar.vue
<script src="../util/index.js"></script>
<template xmlns="http://www.w3.org/1999/html">
  <aside class="page-sidebar">
    <slot name="top"/>
      <div class="page-side-toolbar">
          <div v-for="(item, index) in list" :key="index" class="option-box" @mouseover="showToc($event)" @mouseout="hideToc($event)">
              <img class="nozoom" :src="item.icon" width="24px" />
              <span class="show-txt" v-html="item.title" />
              <div class="toc-container">
                  <div class="pos-box">
                      <div class="icon-arrow"></div>
                      <div class="scroll-box" style="text-align:center">
                          <span v-html="item.popoverTitle"></span>
                          <img :src="item.popoverUrl" height="180px" style="margin:10px;" />
                          <span v-html="item.popoverDesc"></span>
                      </div>
                  </div>
              </div>
          </div>
      </div>
<!--    <slot name="middle"/>

    <slot name="bottom"/>-->
  </aside>
</template>

<script>

import NavLinks from '@theme/components/NavLinks.vue'

export default {
  name: 'PageSidebar',
  data(){

    return {
      list: []
    }
  },
  components: { NavLinks },

  props: ['pageSidebarItems', 'sidebarItems'],

  computed: {
  },
  mounted() {
    this.list = this.$site.themeConfig.extraSideBar
  },
  methods: {
      showToc($event){
          $event.currentTarget.className="option-box on";
      },
      hideToc($event){
          $event.currentTarget.className="option-box";
      },
      showTocOver($event){
          $event.currentTarget.className="option-box-toc-over on";
      },
      hideTocOver($event){
          $event.currentTarget.className="option-box-toc-over";
      },
  }

}

function resolvePrev (page, items) {
  return find(page, items, -1)
}

function resolveNext (page, items) {
  return find(page, items, 1)
}

function find (page, items, offset) {
  const res = []
  flatten(items, res)
  for (let i = 0; i < res.length; i++) {
    const cur = res[i]
    if (cur.type === 'page' && cur.path === decodeURIComponent(page.path)) {
      return res[i + offset]
    }
  }
}

function flatten (items, res) {
  for (let i = 0, l = items.length; i < l; i++) {
    if (items[i].type === 'group') {
      flatten(items[i].children || [], res)
    } else {
      res.push(items[i])
    }
  }
}
</script>

<style lang="stylus">
.page-sidebar
  font-size 12px
  width 3.8rem
  position fixed
  z-index 11
  margin 0
  top 3.6rem
  right 0
  bottom 0
  box-sizing border-box
  border-left 0px solid #eaecef
  ul
    margin 0
  a
    display inline-block
  .nav-links
    display none
    border-bottom 1px solid $borderColor
    padding 0.5rem 0 0.75rem 0
    a
      font-weight 600
    .nav-item, .repo-link
      display block
      line-height 1.25rem
      font-size 1.1em
      padding 0.5rem 0 0.5rem 1.5rem
  & > .sidebar-links
    padding 1.5rem 0
    & > li > a.sidebar-link
      font-size 1.1em
      line-height 1.4
      font-weight bold
    & > li:not(:first-child)
      margin-top .75rem

.toc-container
  display: none;
  position: absolute;
  color $textColor
  left: 100%;
  top: -1px;
  margin-left: 16px;
  width: 240px;
  background: #fff;
  border: 1px solid #eee;
  // -webkit-box-shadow: 0 1px 1px 0 rgba(0,0,0,0.1);
  // box-shadow: 0 1px 1px 0 rgba(0,0,0,0.1);
  // border-radius: 4px;
  left: unset;
  right: 100%;
  margin-right: 10px;
  margin-left: 0;
  .on
    display: block;
  .pos-box
    position: relative;
    padding: 16px;
    .icon-arrow
      position: relative;
      margin-left: -20px;
    .scroll-box
      overflow-x: hidden;
      overflow-y: hidden;
      hr
        margin-top: 0.5rem
      .toc-box
        max-height: 500px;
        overflow-y: auto;
        overflow-x: hidden;
        width: 238px;
        padding-right: 16px;
        -webkit-box-sizing: border-box;
        box-sizing: border-box;
      & > ol
        margin-top: -8px;
        li
          margin-top: 8px;
          line-height: 17px;
          text-align: left;
          overflow: auto;
          text-overflow: ellipsis;
          font-size: 12px;
          white-space: nowrap;
        .sub-box
          margin-top: 0;
        & > ol > li
          padding-left: 15px;

.page-side-toolbar
  position fixed
  right 10px
  top 70px !important
  width 44px
  div.option-box:last-child
    border-top 0px solid #eee
  div.option-box.on
    .toc-container
      display block
  div.option-box
    font-size 12px
    position relative
    display -webkit-box
    display -ms-flexbox
    display flex
    -webkit-box-orient vertical
    -webkit-box-direction normal
    -ms-flex-direction column
    flex-direction column
    -webkit-box-align center
    -ms-flex-align center
    align-items center
    -webkit-box-pack center
    -ms-flex-pack center
    justify-content center
    border-bottom 1px solid #eee
    background-color #fff
    height 60px
    cursor pointer
    .img
      margin-top 2px
    .show-txt
      color gray
      margin-top 3px
      font-size 11px
  div.option-box-toc-over
    font-size 12px
    position relative
    display none
    -webkit-box-orient vertical
    -webkit-box-direction normal
    -ms-flex-direction column
    flex-direction column
    -webkit-box-align center
    -ms-flex-align center
    align-items center
    -webkit-box-pack center
    -ms-flex-pack center
    justify-content center
    border-bottom 1px solid #eee
    background-color #fff
    height 60px
    cursor pointer
    .img
      margin-top 2px
    .show-txt
      color gray
      margin-top 3px
      font-size 11px
    .toc-container
      margin-right 0
  div.option-box-toc
    font-size 12px
    position relative
    display -webkit-box
    display -ms-flexbox
    display flex
    -webkit-box-orient vertical
    -webkit-box-direction normal
    -ms-flex-direction column
    flex-direction column
    -webkit-box-align center
    -ms-flex-align center
    align-items center
    -webkit-box-pack center
    -ms-flex-pack center
    justify-content center
    border-bottom 1px solid #eee
    background-color #fff
    height 60px
    cursor pointer
    .img
      margin-top 2px
    .show-txt
      color gray
      margin-top 3px
      font-size 11px
  div.option-box:hover
    color white
    background #eee
  div.option-box-toc-over:hover
    color white
    background #eee
  div.option-box-toc-over.on
    .toc-container
      display block
  div.option-box-toc
    display none

.page-side-sitemap
  position fixed
  right 10px
  bottom 50px !important
  width 44px
  div.option-box:last-child
    border-bottom 0px solid #eee
  div.option-box.on
    .sitemap-container
      display block
  div.option-box
    font-size 12px
    position relative
    display -webkit-box
    display -ms-flexbox
    display flex
    -webkit-box-orient vertical
    -webkit-box-direction normal
    -ms-flex-direction column
    flex-direction column
    -webkit-box-align center
    -ms-flex-align center
    align-items center
    -webkit-box-pack center
    -ms-flex-pack center
    justify-content center
    border-bottom 1px solid #eee
    background-color #fff
    //height 60px
    cursor pointer
    .show-txt
      color gray
      margin-top 2px
      font-size 11px
      padding 4px 0
  div.option-box:hover
    //color white
    //background #eee

.sitemap-container
  display: none;
  cursor auto
  position: absolute;
  color $textColor
  left: 100%;
  bottom: -30px;
  height: 500px;
  margin-left: 16px;
  padding: 0 10px;
  width: 850px;
  background: #fff;
  -webkit-box-shadow: 1px -2px 10px 7px rgba(0,0,0,0.08);
  box-shadow: 1px -2px 10px 7px rgba(0,0,0,0.08);
  border-radius: 4px;
  left: unset;
  right: 100%;
  margin-right: 2px;
  margin-left: 0;
  h4
    margin: 5px 0;
    font-size: 13px;
    text-align: center;
    padding: 3px 2px;
    border-bottom: 1px solid #eaecef;
    background: #42b983;
    color: white;
    .sitemap-top-link
      color: white;
      font-size: 10px;
      float:right;
      padding:2px 5px;
      text-decoration:underline;
  .on
    display: block;
  .pos-box
    position: relative;
    padding: 10px;

@media (max-width: $MQNarrow)
  .option-box-toc
    display none
  .page-side-toolbar
    right 6px
    top 65px !important
    div.option-box-toc-over
      display flex
  .page-side-sitemap
    right 6px

@media (max-width: $MQMobile)
  .page-sidebar
    display none
  .sidebar
    .nav-links
      display block
      .dropdown-wrapper .nav-dropdown .dropdown-item a.router-link-active::after
        top calc(1rem - 2px)
    & > .sidebar-links
      padding 1rem 0
</style>
效果:

参考鱼皮大佬vuepress codefather项目:https://github.com/liyupi/codefather
十九、右侧导航栏设置
在config下增加PageSidebarToc.vue和PageSidebarTocLink.vue
PageSidebarToc.vue
<template>
 <DropdownTransition>
    <ul class="toc-sidebar-links" v-if="items[0].children.length">

        <li v-for="(item, i) in items[0].children" :key="i">
            <PageSidebarTocLink  :sidebarDepth="sidebarDepth" :item="item"/>
        </li>
    </ul>
  </DropdownTransition>
</template>

<script>
import PageSidebarTocLink from '@theme/components/PageSidebarTocLink.vue'
import DropdownTransition from '@theme/components/DropdownTransition.vue'
import { isActive } from '../util'

export default {
  name: 'PageSidebarToc',

  components: { PageSidebarTocLink, DropdownTransition },

  props: [
    'items',
    'depth',  // depth of current sidebar links
    'sidebarDepth' // depth of headers to be extracted
  ],

  data () {
    return {
      openGroupIndex: 0
    }
  },

  created () {
    this.refreshIndex()
  },

  watch: {
    '$route' () {
      this.refreshIndex()
    }
  },

  methods: {
    refreshIndex () {
      const index = resolveOpenGroupIndex(
        this.$route,
        this.items[0].children
      )
      if (index > -1) {
        this.openGroupIndex = index
      }
    },

    toggleGroup (index) {
      this.openGroupIndex = index === this.openGroupIndex ? -1 : index
    },

    isActive (page) {
      return isActive(this.$route, page.regularPath)
    }
  }
}

function resolveOpenGroupIndex (route, items) {
  for (let i = 0; i < items.length; i++) {
    const item = items[i]
    if (descendantIsActive(route, item)) {
      return i
    }
  }
  return -1
}

function descendantIsActive (route, item) {
  if (item.type === 'group') {
    return item.children.some(child => {
      if (child.type === 'group') {
        return descendantIsActive(route, child)
      } else {
        return child.type === 'page' && isActive(route, child.path)
      }
    })
  }
  return false
}
</script>
PageSidebarTocLink.vue
<script>
import { isActive, hashRE, groupHeaders } from '../util'

export default {
  functional: true,

  props: ['item', 'sidebarDepth'],

  render (h,
    {
      parent: {
        $page,
        $site,
        $route,
        $themeConfig,
        $themeLocaleConfig
      },
      props: {
        item,
        sidebarDepth
      }
    }) {
    // use custom active class matching logic
    // due to edge case of paths ending with / + hash
    const selfActive = isActive($route, item.path)
    // for sidebar: auto pages, a hash link should be active if one of its child
    // matches
    const active = item.type === 'auto'
      ? selfActive || item.children.some(c => isActive($route, item.basePath + '#' + c.slug))
      : selfActive
    const link = item.type === 'external'
      ? renderExternal(h, item.path, item.title || item.path)
      : renderLink(h, item.path, item.title || item.path, active)

    const maxDepth = [
      $page.frontmatter.sidebarDepth,
      sidebarDepth,
      $themeLocaleConfig.sidebarDepth,
      $themeConfig.sidebarDepth,
      1
    ].find(depth => depth !== undefined)

    const displayAllHeaders = $themeLocaleConfig.displayAllHeaders
      || $themeConfig.displayAllHeaders

    if (item.type === 'auto') {
      return [link, renderChildren(h, item.children, item.basePath, $route, maxDepth)]
    } else if ((active || displayAllHeaders) && item.headers && !hashRE.test(item.path)) {
      const children = groupHeaders(item.headers)
      return [link, renderChildren(h, children, item.path, $route, maxDepth)]
    } else {
      return link
    }
  }
}

function renderLink (h, to, text, active) {
  return h('router-link', {
    props: {
      to,
      activeClass: '',
      exactActiveClass: ''
    },
    class: {
      active,
      'toc-sidebar-link': true
    }
  }, text)
}

function renderChildren (h, children, path, route, maxDepth, depth = 1) {
  if (!children || depth > maxDepth) return null

  return h('ul', { class: 'toc-sidebar-sub-headers' }, children.map(c => {
        const active = isActive(route, path + '#' + c.slug)
        let itemClass = 'toc-sidebar-sub-header'
        if (c.level <= 3) {
          itemClass += active ? ' active' : ''
        } else if (c.level > 3 && c.level <= 6) {
          itemClass += ` toc-sidebar-depth-${c.level}`
        }
        return h('li', { class: itemClass }, [
        renderLink(h, path + '#' + c.slug, c.title, active),
        renderChildren(h, c.children, path, route, maxDepth, depth + 1)
        ])
  }))
}

function renderExternal (h, to, text) {
  return h('a', {
    attrs: {
      href: to,
      target: '_blank',
      rel: 'noopener noreferrer'
    },
    class: {
      'toc-sidebar-link': true
    }
  }, [text, h('OutboundLink')])
}
</script>

<style lang="stylus">
.toc-sidebar .toc-sidebar-sub-headers
  padding-left 1rem
  font-size 0.95em

a.toc-sidebar-link
  font-size 0.9rem
  font-weight 400
  display inline-block
  color $textColor
  //border-left 0.25rem solid transparent
  //padding 0.35rem 1rem 0.35rem 1.25rem
  line-height 1
  width: 100%
  box-sizing: border-box
  &:hover
    color $accentColor
  &.active
    font-weight 600
    color $accentColor
    border-left-color $accentColor
  .toc-sidebar-sub-headers &
    padding-top 0.25rem
    padding-bottom 0.25rem
    border-left none
    font-weight 300
    &.active
      font-weight 500
.toc-sidebar-depth-4
  list-style-type: none;
  margin-left 0.8rem
.toc-sidebar-depth-5
  list-style-type: none;
  margin-left 1.6rem
.toc-sidebar-depth-6
  list-style-type: none;
  margin-left 2.4rem
</style>Page.vue做相应的修改
<div class="toc-container-sidebar" ref="tocc">
  <div class="pos-box">
      <div class="icon-arrow"></div>
      <div class="scroll-box" style="max-height:86vh">
          <div style="font-weight:bold;">{{pageSidebarItems[0].title}}</div>
          <hr/>
          <div class="toc-box">
              <PageSidebarToc :depth="0" :items="pageSidebarItems" :sidebarDepth="6"/>
          </div>
      </div>
  </div>
</div>
<script>
import PageSidebarToc from '@theme/components/PageSidebarToc.vue'
export default {
  components: { PageEdit, PageNav,PageSidebarToc },
  props: ['sidebarItems', 'pageSidebarItems'],
  mounted() {
    console.log(this.$site,this, 'this.$site')
  }
}
</script>
效果:

二十、添加版权信息
我们继续研读鱼皮大佬的代码,他为每一个网页都增加了footer版权信息,我们也来实现一下。
在config下增加footerConfig.js
/**
 * 底部版权信息
 */
module.exports = {
    friendLinks: [
        {
            label: "站长 - 勤奋的凯尔森同学",
            // icon: "/icon/user.svg",
            href: "http://www.huerpu.cc:7000",
        },
        {
            label: "PVE",
            href: "https://www.huerpu.cc:1660/",
        },
        {
            label: "GitLab",
            href: "http://www.huerpu.cc:2080/",
        },
        {
            label: "资料下载",
            href: "http://www.huerpu.cc:4090/index.php?dir=/hepcloud",
        },
        {
            label: "Chevereto图床",
            href: "http://www.huerpu.cc:6391/",
        },
    ],
    copyright: {
        href: "https://beian.miit.gov.cn/",
        name: "鲁ICP备17054632号",
    },
};
在config.js中增加footer配置
const footer = require('./config/footerConfig');
themeConfig: {
        footer: footer,
},在Layout.vue中做相应修改,和上面添加右边栏类似。
<Page
    v-else
    :sidebar-items="sidebarItems"
    :page-sidebar-items="pageSidebarItems"
>
    <template #top>
        <slot name="page-top" />

    </template>
    <template #bottom>
        <slot name="page-bottom" />
        <Vssue class="theme-default-content content__default" :options="{ locale: 'zh' }" />
        <Footer />
    </template>
</Page>
<script>
import Footer from "@theme/components/Footer.vue";
components: { Home, Page, Sidebar, Navbar, PageSidebar,Footer },
</script>在components下增加footer.vue
<template>
    <main class="footer">
        <div v-for="(item, index) in footerList" :key="index" class="footer-item">
            <a :href="item.href" target="_blank" rel="noopener noreferrer">
                <img v-if="item.icon" :src="item.icon" alt="icon" class="item-icon" />
                <span class="item-text">{{ item.label }}</span>
            </a>
        </div>
        <div class="copy-right">
           <span class="name">{{`${currentYear} 勤奋的凯尔森同学   |    `}} </span>
            <a :href="government.href" target="_blank" rel="noreferrer" >
              {{government.name}}
            </a>
        </div>
    </main>
</template>

<script>
export default {
    name: 'Footer',
    data () {
        return {
            footerList: [],
            government: {},
            currentYear : ''
        }
    },

  props: ['sidebarItems'],
  mounted() {
    this.footerList = this.$site.themeConfig.footer.friendLinks
    this.government = this.$site.themeConfig.footer.copyright
    this.currentYear =  new Date().getFullYear()
  }
}
</script>

<style lang="stylus">
@require '../styles/wrapper.styl'
//@media (max-width: $MQMobile)
//  .footer-item a
//    margin-right 0 !important
.footer
  padding 2rem 0
  display flex
  justify-content center
  background-color #f0f2f5
  flex-wrap wrap
.footer-item
  padding 0 1rem
.footer-item a
    display inline-flex
    justify-content center
    align-items center
    color #85858a

.item-icon
  width 1.4rem
  height 1.4rem
  margin-right 0.4rem
.copy-right
    width 100vw
    display flex
    justify-content center
    margin-top 1rem
    color #85858a
.copy-right .name
    margin-right 0.4rem
</style>
效果:

二十一、网站排名优化
Sitemap(网站地图)是一种提供网站页面、视频、PDF文件等有关信息的文件,一般名称设置为sitemap.xml。制作Sitemap,并提交给搜索引擎可以使网站的内容完全被收录,包括那些隐藏比较深的页面。这是一种网站与搜索引擎对话的好方式。
// https://github.com/ekoeryanto/vuepress-plugin-sitemap
yarn add vuepress-plugin-sitemap

[
    "sitemap",
    {
        hostname: "http://www.huerpu.cc",
    },
],
修改build脚本
scripts: {
    build: "vuepress build docs -d dist",
    postbuild: "vuepress-sitemap -H http://www.huerpu.cc -d dist"
}
这时候去build会报错
 SITEMAP  Generating sitemap...
error vuepress-plugin-sitemap apply generated failed.
RangeError: Invalid time value
    at Date.toISOString (<anonymous>)
    at dateFormatter (C:\Users\jason\IdeaProjects\KelsenJing\node_modules\vuepress-plugin-sitemap\index.js:24:60)
    at C:\Users\jason\IdeaProjects\KelsenJing\node_modules\vuepress-plugin-sitemap\index.js:69:13
    at Array.forEach (<anonymous>)
    at generated (C:\Users\jason\IdeaProjects\KelsenJing\node_modules\vuepress-plugin-sitemap\index.js:56:13)
    at AsyncOption.asyncApply (C:\Users\jason\IdeaProjects\KelsenJing\node_modules\@vuepress\core\lib\node\plugin-api\abstract\AsyncOption.js:33:21)
    at PluginAPI.applyAsyncOption (C:\Users\jason\IdeaProjects\KelsenJing\node_modules\@vuepress\core\lib\node\plugin-api\index.js:277:32)
    at Build.render (C:\Users\jason\IdeaProjects\KelsenJing\node_modules\@vuepress\core\lib\node\build\index.js:111:34)
    at async App.build (C:\Users\jason\IdeaProjects\KelsenJing\node_modules\@vuepress\core\lib\node\App.js:499:5)

Process finished with exit code 1
这可能是因为你设置了 lastUpdated 或者使用了 @vuepress/last-updated插件,当两个一起用的时候,因为时间对象的缘故,产生了报错,我们搜索 vuepress-plugin-sitemap 的 issues,可以找到一个解决方法,我们修改一下 pluginsConfig.js。
[
    '@vuepress/last-updated',
    {
        transformer: (timestamp, lang) => {
            return new Date(timestamp).toLocaleDateString();
        }
    }
],
这时候就可以build啦。
参考于:https://blog.csdn.net/weixin_55475226/article/details/123427925
渐进式增强网页应用,PWA(Progressive Web App)是Google公司提出的,在移动端利用标准化框架,在网页应用中实现和原生应用相近的用户体验的渐进式网页应用。
yarn add -D @vuepress/plugin-pwa

['@vuepress/pwa']
SEO(Search Engine Optimization):汉译为搜索引擎优化。是一种方式:利用搜索引擎的规则提高网站在有关搜索引擎内的自然排名。目的是让其在行业内占据领先地位,获得品牌收益。很大程度上是网站经营者的一种商业行为,将自己或自己公司的排名前移。
// https://github.com/lorisleiva/vuepress-plugin-seo
yarn add vuepress-plugin-seo -D

[
  "seo",
  {
    siteTitle: (_, $site) => $site.title,
    title: ($page) => $page.title,
    description: ($page) =>
      $page.frontmatter.description || $page.description,
    author: (_, $site) => $site.themeConfig.author || author,
    tags: ($page) => $page.frontmatter.tags || tags,
    type: ($page) => "article",
    url: (_, $site, path) =>
      ($site.themeConfig.domain || domain || "") + path,
    image: ($page, $site) =>
      $page.frontmatter.image &&
      (($site.themeConfig.domain &&
        !$page.frontmatter.image.startsWith("http")) ||
        "") + $page.frontmatter.image,
    publishedAt: ($page) =>
      $page.frontmatter.date && new Date($page.frontmatter.date),
    modifiedAt: ($page) => $page.lastUpdated && new Date($page.lastUpdated),
  },
],
二十二、自动化部署
我想要的功能是,只要一提交代码到github私有仓库,就可以触发部署动作,并且部署到我的内网PVE机器上的一天Ubuntu主机上,这台主机做了内外穿透,可以外网访问到。github上的Actions是很强大的,咱们就用这个东东来耍一耍。
22.1 配置仓库密钥
点击 Settings → Sectets and variables → Actions → New repository secret

依次添加以下变量
| Name | Value |
|---|---|
| SERVER_HOST | 服务器公网IP或域名 |
| SERVER_USERNAME | 登录服务器用户名 |
| SERVER_PASSWORD | 登录服务器密码 |
| SERVER_PORT | ssh端口号 |

22.2 配置 Actions 工作流
点击 Actions → set up a workflow yourself

新建的 ci.yml文件名可以自定义,把下面代码贴过来,点击提交。

监听事件,只要有代码提交到main分支,就会触发部署动作。
-
branches:根据自己仓库分支名进行修改,如main。
-
node-version:根据项目支持的 node 版本进行修改。
-
source:指定上传的文件目录(项目配置的打包目录名称)。
-
target:指定上传服务器目录。
name: Build and Deploy
# 监听 main 分支上的 push 事件
on:
  push:
    branches:
      - main
jobs:
  build-and-deploy:
    # 构建环境使用 ubuntu
    runs-on: ubuntu-latest
    steps:
      # 官方action, 将代码拉取到虚拟机
      - name: Checkout
        uses: actions/checkout@v3
        with:
          persist-credentials: false

      - name: Setup Node.js
        uses: actions/setup-node@v3
        with:
          # 选择要使用的 node 版本
          node-version: "16.20.2"
          # 缓存 pnpm 依赖
      - name: Install and Build
        run: |
          yarn install
          yarn docs:build

      # 部署到服务器
      - name: Upload to Deploy Server
        uses: appleboy/scp-action@master
        with:
          # 服务器域名
          host: ${{ secrets.SERVER_HOST }}
          # 服务器用户名
          username: ${{ secrets.SERVER_USERNAME }}
          # 服务器密码
          password: ${{ secrets.SERVER_PASSWORD }}
          # 服务器端口
          port: ${{ secrets.SERVER_PORT }}
          # 指定上传的文件目录(项目配置的打包目录名称)
          source: './dist/*'
          # 指定上传服务器目录
          target: '/usr/software/kelsen'
          # 解压时覆盖现有文件
          overwrite: true
          # 删除指定数量的前导路径元素
          strip_components: 1
提交一下代码,触发一下部署任务。

出现绿色图标就说明部署成功了。

我们把主页显示的名称修改一下,然后提交到github,看它自动部署到Ubuntu并生效

看一下主页:

参考文档:https://blog.csdn.net/weixin_43233914/article/details/134186796
本文主要参考文档
vuepress官网: https://vuepress.vuejs.org/zh/theme/default-theme-config.html
vuepress主题:https://vuepress.vuejs.org/zh/theme/inheritance.html#%E4%BD%BF%E7%94%A8
飞跃高山与大洋的鱼:https://www.bilibili.com/video/BV1vb411m7NY?p=4&vd_source=abf91b9d7b206ea0120ba1a448905f56
鱼皮大佬vuepress codefather项目:https://github.com/liyupi/codefather